Sunday, May 27, 2012

Week 21: Gourd Light- Bitti!

My fingers ache... there are seed beads ALL OVER my house... and my back is sore from sitting hunched over a gourd for three days... But my lovely gourd is finished (or bitti)! 

Ohhh...

Ahhh...

That's what you were thinking right?

Now that my gourd is finished, I know why I never see them made with seed beads. 
First of all, none of them are uniform in size.  They are all slightly different, which means a bunch of slightly different sized holes.

Secondly, they aren't spherical.  Sometimes the hole is facing out, sometimes the side is facing out, and sometimes it goes in all wonky.  Makes for a rough looking surface. 

Thirdly, seed beads are SO SMALL! I probably had to use two or three times as many beads as I would have had I used the right kind of bead. And my fingers are really angry. 
The bead on the left is the approximate size of the right bead. Notice that purple bead.  This is the kind of random bead sizes I'm working with.
If I ever make another one, I'll try to use the right beads, (and drill bit). That being said, I love how it turned out.

Sunlight...

Bulb light...

Candle light...

Gourd-geous.

Bracelet Buddies

Our time in Turkey is coming to a close.  We'll be saying goodbye to many coworkers who have become good friends. Bummer. 

We hosted a dinner party for all of the Kindergarten teachers on Wednesday, and I made bracelets for each of them, as "Thank you and goodbye" gift.  

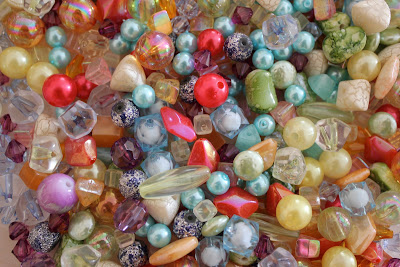
I made them out of a million different beads in every colour imaginable.
If I could fill a pool with these and dive in I would... SO LOVELY!
And I used elastic to string them. 

20 teachers...
 20 bracelets.  I love them all

But especially this Strawberry Lemonade one.

And this beachy version of Fenerbahçe team colours.

And Berry Delicious.

And Sunrise.

And "Frog Prince."

Sunday, May 20, 2012

Week 20: Gourd Lights- Part 2

For Week 18, Alan and I picked up some gourds and got to work cleaning them out and designing a pattern"We" may not be accurate. Alan is waiting for inspiration.  

I left off with some outlines of flowers, and a plan to come back to it with a bigger drill bit to make holes the right size for beads.
Part 1

Unfortunately, our super-awesome-drill-for-19-lira only comes with one size drill bit, and none of the other manufacturers' bits fit.  Bummer.  So Alan had the great idea to just buy some screws that were the right size and use those as drill bits. Too bad he is TERRIBLE at estimating the right size of screw.  The ones we ended up with made the same size hole as our drill bit.  I was super frustrated at this point, and put the gourd on a time-out in our spare room, with all of my other crafting materials.

Two days later when I went in there to find a t-shirt, I was in a better space. And I saw that little gourd in a whole new light.  Sitting right there next to the gourd were seed beads left over from some jewelery making. And wouldn't you know it? They fit perfectly!  Now I don't even need a new drill bit, I just need to get drilling. 
Seed Beads to the rescue!
So I did!  I drilled the heck out of that little gourd.
  Filling in the flower petals...

 Adding a ton of holes to the top (to cover up an extremely unattractive flower I thought I could free-hand drill)...

And adding some tiny flowers around the bottom. 

Then I contemplated colour. I loved the natural colour of the gourd, but there were some rather nasty blemishes, so I felt like I had to paint it.  I went with a creamy base, and gold accents.  I love it even more now.

Part 3 will involve me filling each and every hole with a bead.  I've started the process, and now know why these lights are so expensive.  Parts 1 and 2 were cake. THIS ONE IS NOT. It involves re-drilling each hole to get the paint and crud out, and then maybe finding out I drilled too much, and re-adding the paint.  Grr.  Also it involves me pushing really hard on itty-bitty glass beads. A million times.  My fingers are not pleased.

  But I have a feeling it will be worth all the pain...

Saturday, May 19, 2012

Rocks, Rings, and Jumpy Things- Focus on Photos

We're spending this weekend in the absolutely GORGEOUS, peaceful and relaxing Adrasan.  Tonight we will hike to the top of "fire mountain," so my mom can stop asking if we've seen it yet.  I couldn't be more pleased with our little get away.  Real pictures of that will be posted soon on the Turkey Blog.

But today I took another foray into the world of photography.  I've been inspired by a series of mini photography lessons on my favourite crafty blog deliacreates.blogspot.com. And decided to play around with close-ups.

Beautiful beach pebbles...

Wet and shiny...

 I was in charge of the rings while Alan swam...

So I decided to play wedding photographer. 

Then I met this guy.

And this guy.

And their friend.

This one is pretty blurry, but I had to add it for so many reasons.  First of all: I DO NOT LIKE JUMPY BUGS, and this is the closest I've ever purposefully put my face to a bug. All in the name of photography. You're welcome.   Secondly: I noticed as I was focusing, that he was pooping as I was taking the picture. Shame on you, bug. Thirdly: he wasn't too happy with me for taking a picture of him in the act.  Right as I pushed the button he jumped, aiming FOR MY FACE. He missed because I screamed and ducked, but he did land on the back of my neck.  Which caused more screaming.  Thank God Sonya came to my rescue.  

And last, the cutest little frogs EVER. I love frogs. 
 

Sunday, May 13, 2012

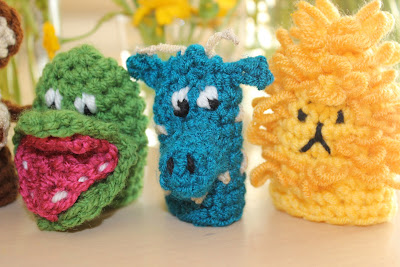
Week 19: Jungle Finger Puppets

 Back in January my cousin, Misty, requested that I craft something for her son.  Only he hates hats, and I was in a hat craze.  So I kept Misty in the back of my mind, and now here we are in May, and I just now got to it.  Misty asked me to make something she and her son could play with, which I was thrilled to do, but again, I was left wishing I had my sewing machine, or a good craft store that sells felt, and other goodies.

This past week I started crocheting through my over-flowing basket-o-yarn, in preparation to leave Turkey with as little luggage as possible.  The yarn isn't going to make the cut.  So I started making produce bags again (cus those things are a hit).  But that got boring fast.  It was time for something new.  Out of my boredom a jungle of finger puppets was born.

I laugh every time I look at them.

And, I'm proud to say that I used zero internet inspiration for these bad boys, because the internet in our apartment has been down all week.  (Probably why I've been so productive).

They were pretty easy and fun to make, each one taking around an hour.

I love them so much that I play with them while I'm on the couch.  I line them up on the table, and hide them in the flowers. They've become my new friends. And now they will be yours too.

Meet Leroy. This Zebra loves long walks on the plains, and long talks with good friends. He is usually pretty mellow and laid back, but talk smack on his favourite lacrosse team and you see a whole different side of him.

This is Mathilda.  She is one shy and quiet elephant, although she will argue that most elephants are on the shy side.  She loves to read, her favourite authors being Hemingway and Shakespeare. Get a few glasses of bubbly in her and she may even perform a sonnet or two.

Oh Howard... Howey is not your usual crocodile.  He gave up his meat-eating-ways when he made friends with all of his food options. His diet now consists of organically grown leafy greens, and pond scum, but his friends don't running screaming from him anymore, so it's a good trade. 

The monkey is Maurice. He isn't as shy as this picture might suggest.  He's messing with you.  As one of 14 monkey siblings, he's learned to wrestle, tickle and throw poop with the best of them.  He's famous in this group of friends for being able to lighten any mood.

Lester is a little grumpy right now, but that isn't always the case.  His general disposition is bright and cheerful, but get a camera out before he's had a chance to style his mane, and this is the scowl you'll get.

Gertrude is one of a kind (aren't we all?).  Born with a rare fur disorder, Gertrude is the only giraffe she has ever met who is turquoise. Be she doesn't see it as a curse, blue is her favourite colour!

Time to say good-bye to my little friends.  They're off to Washington to play with Lucian.  I hope he has as much fun with them as I did. Happy Mother's Day Misty!

All of the animals bodies were made the same way:
Magic loop, 5 single stitches into the center, pull tight.
Round 2: 2 single stitches into each stitch
Round 3 to finish: single stitch all around. 
Eyes, spots and stripes were added after with a yarn needle.
Muzzles are mini versions of the bodies: Magic loop, five single stitches, single stitch around for a few rows.   
Ears were all made differently, by trial and error kind of.  
Leroy's mane is made by tying all of those strings on and double knotting.  Giving him a hair cut was fun.
Lester's mane was made with a loop stitch, and was quite a pain in the butt.  I added the hair as I was making the body (the only way I could crochet from the inside of something so small). I don't recommend trying this if you get frustrated easily. 

I'm way too lazy to make patterns for all of these little guys right now, but if anyone out there is dying for a tutorial, I'll make it happen.  Let me know.

Monday, May 7, 2012

Week 18: Gourd Lights- Part 1

When we moved to Turkey two years ago, I fell in LOVE with the beautiful gourd lights I found hanging in many shops.  Falling in love with gourds is nothing new for me.  They are my absolute favourite fall and Halloween decoration, and I have acquired some mini versions that are some of my favourite Christmas decorations.  I have a gourd addiction that I have no plan to recover from. 

We brought several gourd lights back to America with us that we used over our dance floor at our wedding.
Dazzling, wouldn't you say?
 Well... If you know me at all by now, you know that the second I spied these beauties I figured I too could make them. I spend most of my time in gourd shops studying designs, and figuring out how they are made.  I have a dream of becoming a gourd artisan some day.

I've been putting this dream off, because we didn't own a drill, and those holes are all drilled.  I've wanted to buy one, but we've resisted for the sake of not amassing things we will have to get rid of when we move home. 

But last month the bed broke, and so did our will-power around not buying a drill.  
So naturally we better make good use of that thing!

So, while visiting the castle with Alan's family last week, I stopped in to say hello to my gourd lady, and picked-up these two lovely things for a total of 4 lira. Score.

Then I wasted 3 hours of my day looking for the freaking Leatherman. 
But then I found it. (phew)
So. Tools for step 1:
Saw of some sort, sand paper, sketch pad, scissors, pencil, and cute little drill with varying bits. 

 First: cut rather large hole in the bottom of gourd. Sand smooth.
 

 After cutting off the bottoms (and finding inspiration for a later craft called "gourd bikini")...

 and removing the seeds (or as I like to refer to them: "my future gourd farm")...

You're left with this.  This hole will allow you to attach a light bulb, or maybe a tea light candle. 

Next: Sketch a plan.  Cut out a few shapes you can trace, because sketching on a rounded surface is very difficult.  I traced a leaf like shape, overlapping three times, to make a flower shape. 

Use the thinnest drill bit you can find to outline all of the designs.  These holes wont have colour beads in them, they will just be specks of light.

I just followed the lines drilling as evenly as I could. 

Sometimes it got wonky. 

But mostly, I love it. 

Unfortunately our baby drill only came with one drilling bit. Bummer.  So our next step will be finding the right size bit for bead holes. And purchasing beads. 

But the first step of this project was surprisingly more simple than I was expecting!  All told I spend about four hours on this baby, and three of those were spent finding the Leatherman. (I put it away more carefully this time.)

When we find what we need I'll fill all of the petals with bead sized holes, and add some more little shapes between the flowers.  

Also I'll paint.  

Then I'll add the beads, and we will all sigh at it's splendid beauty.  I'm sure of it.

To see the rest of the drilling, and the painting go to part 2.

And to see the completed project.. Part 3!