Tuesday, February 28, 2012

Bamboo: Take 2

Remember a few weeks ago, when I found a bunch of bamboo on the beach, and had visions of all the super easy and free crafts I could make with it?  Remember how I was sure that bamboo would be as easy to cut as butter, even though Nay-Saying-Alan wasn't so sure? Remember how I was dead wrong? If you don't know what I'm talking about, click here. Otherwise you won't have any idea how I worked out the butter knife problem...

So... I started with bamboo that looked like this...
  I didn't like how dirty it looked.  Also, I had some pieces that looked really old, and other pieces that looked super fresh, and I didn't like how un-uniform they looked. (For future reference, older dryer bamboo is so much easier to cut that new fresh bamboo.)

Anyway, I picked up some beige coloured spray paint to freshen it up.

Much better, don't you think?

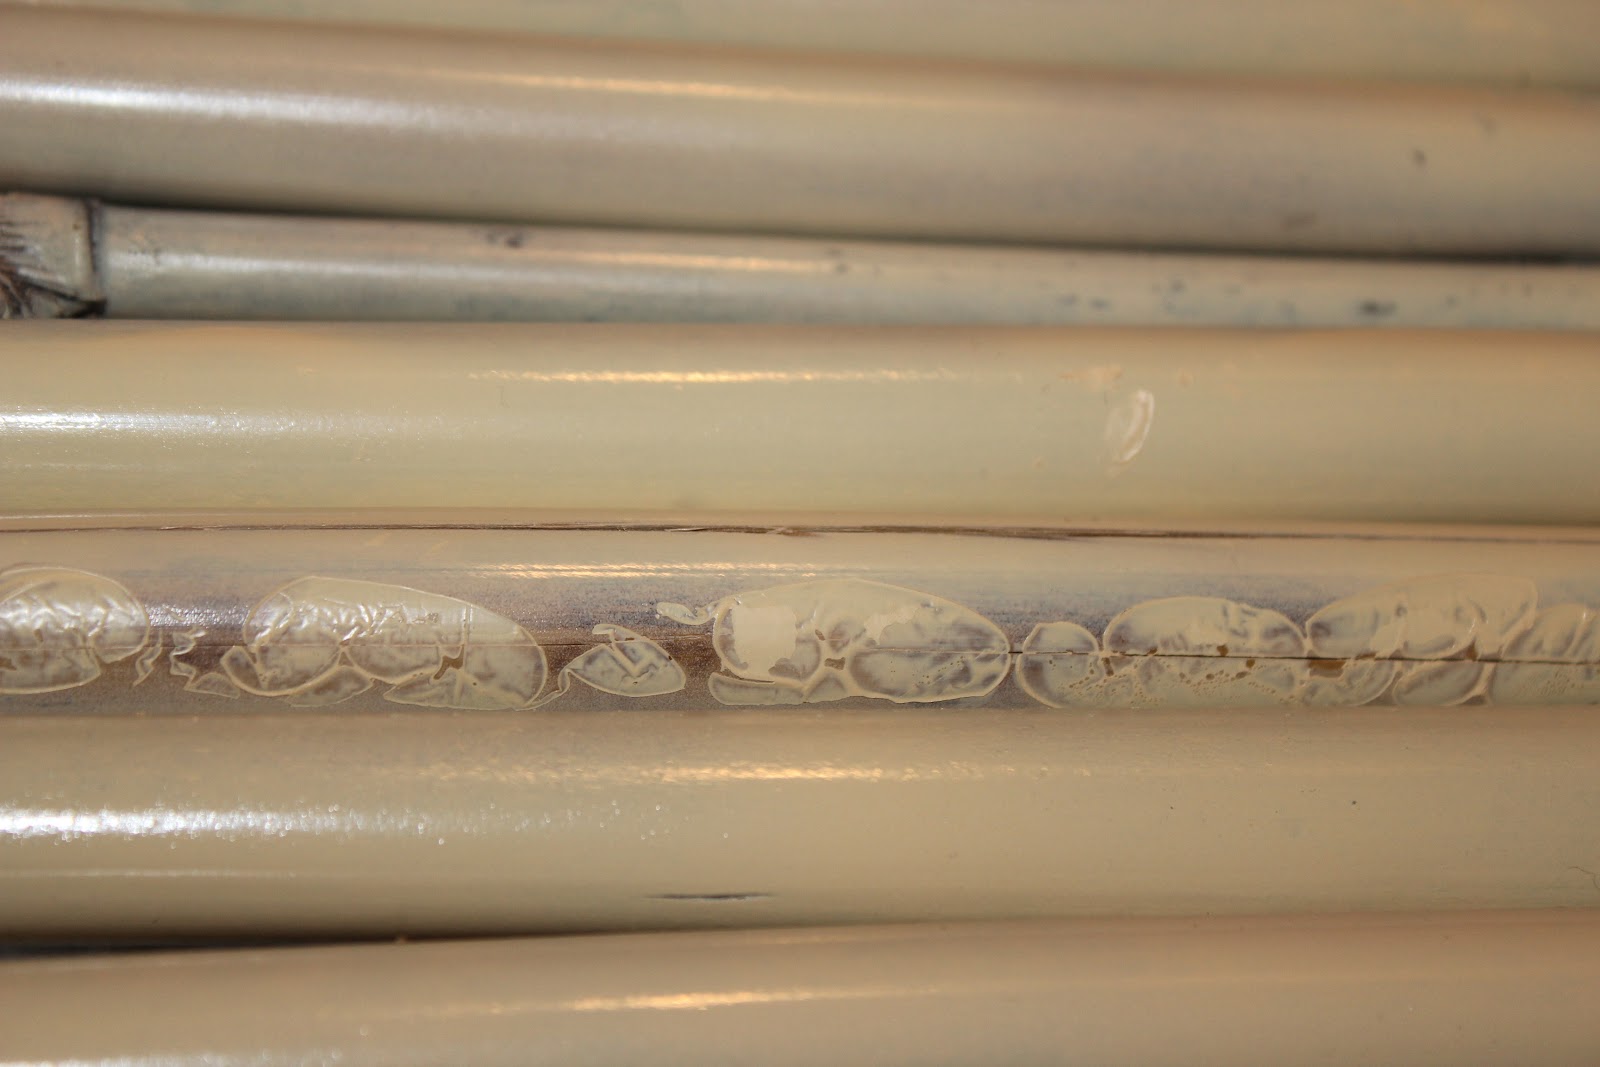
Although, don't look too close, because I got tired of the spray-from-a-foot-away, coat-lightly-a-million-times method.  Cus that's exhausting, and I'm not a rule follower. Unfortunately, when I decided to spray from a few inches away, and heavily coat, the pain puddled under the bamboo, and looked terrible on the underside. 

Can you spy the one I didn't follow the rules on?
 

In my earlier post I cut all the bamboo.  Painstakingly. I cut a bunch of short ones, medium ones and long ones, with a rectangular crate dancing around my mind's eye. 
  
 But also, I'm lazy when it comes to perfect cutting.  Good thing I'm not a perfectionist, because I used all the bamboo, whether it had puddle paint, wasn't exactly the right length, or had big broken ends.  It's all good.  I'm an inclusion-ist.


Once all the bamboo was cut, and painted, I started tying it together with twine. 

I didn't actually look up any sailor knots, I just aimed at making lovely 'x' shapes.  Maybe I should have though, because a lot fell out, and I had to tear others out because they looked funny. 

I made a rectangle shape first, and then added some... support?... cross bars?... see them.  I don't know what to call them. (I LOVE that wavy one.)

Then I turned it, and added more cross bars, to make a grid. This was to be the base of my crate. 

The crate that never was.  For a few reasons.
  1. Tying knots in corners was SUPER CHALLENGING. 
  2. Tying knots while trying to hold something in a standing position was A PAIN.
  3. Even after STRUGGLING through attaching a side to the base, it was really wobbly.
  4. I WAS OVER IT. 
So I shoved it into the corner and glared at it for a few days.  I considered hanging it parallel to the ground, and attaching... something... to it to make a wind chime... but I didn't like that idea.  

Stupid Bamboo. 

Then Sonya suggested I use the left over bamboo to make picture frames. Loved it. 

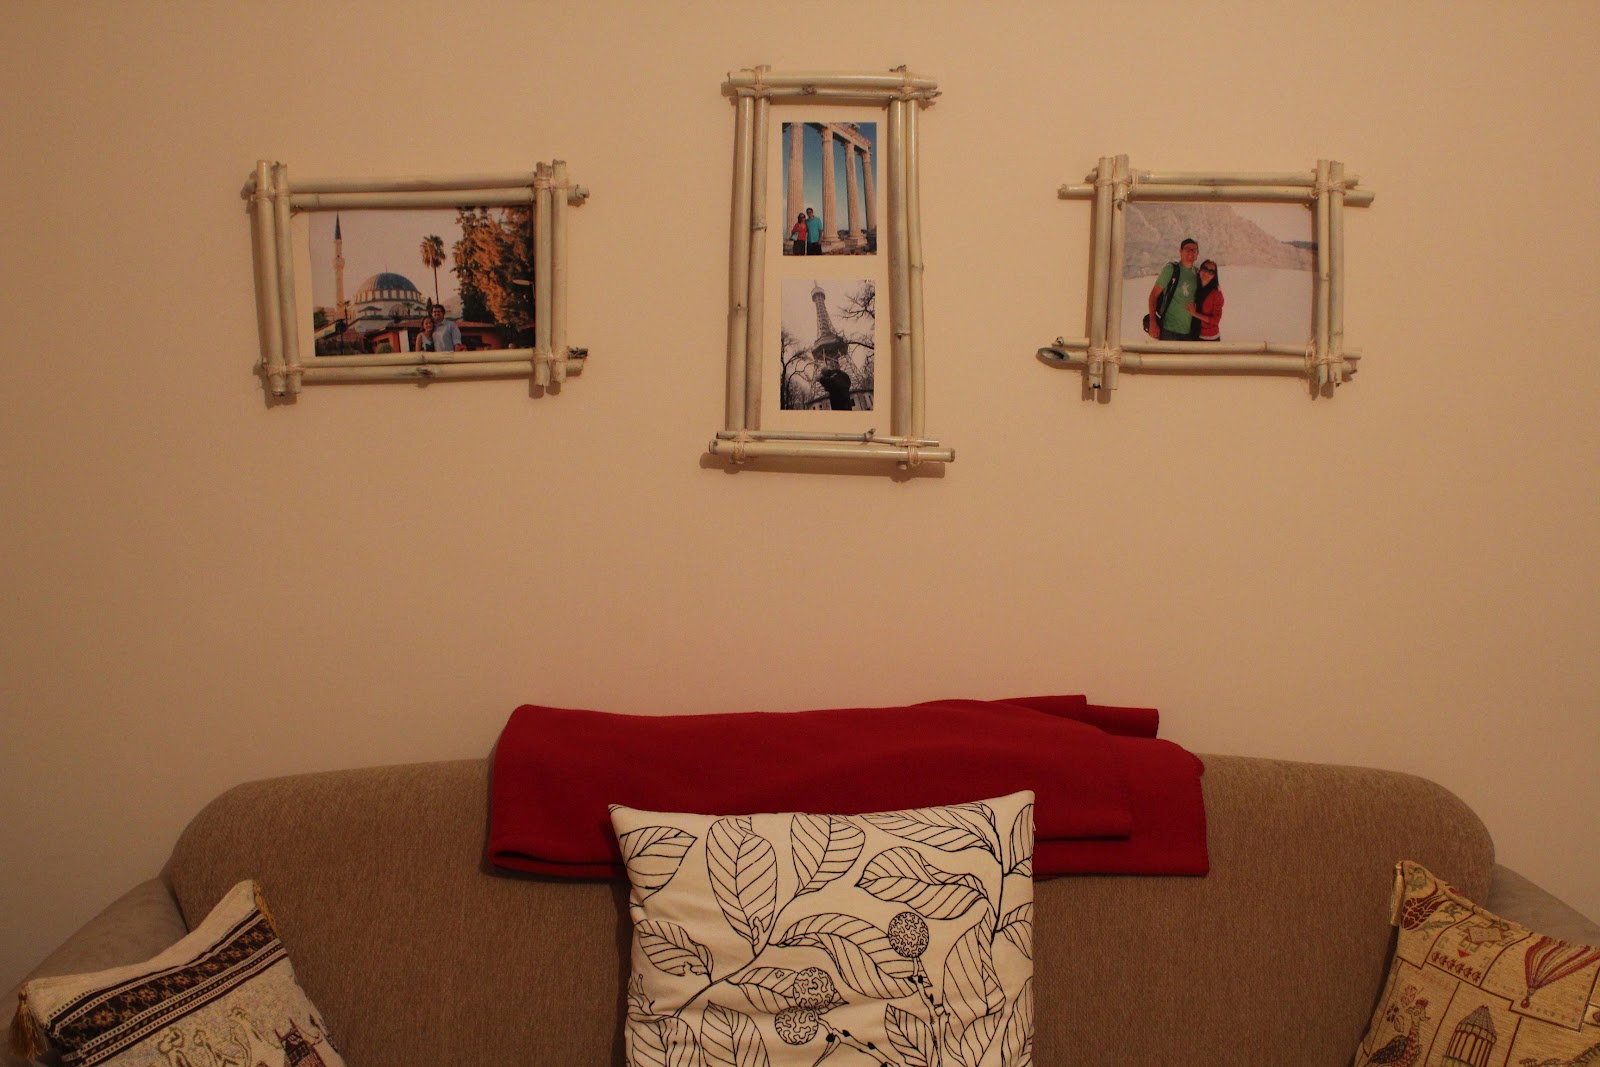
So I did.  And here they are. 

 No backing, no glass, just pictures taped straight to the wall and bamboo to frame them. 

I had to invent a new knot (then again, I didn't look up any knots, so maybe someone else actually invented it). 

 I would try and explain how I tied them, but I have no idea. Sorry.

 I wanted to do pictures of Alan and me on our different trips around the world...

 Side, Turkey. (The story of our trip here.)

 Prague's version of the Eiffel tower. (Prague trip here.)
 
 Pamukkale, Turkey. (Link here.)

 Alanya, Turkey. 

Not impressed by variety? Me neither.  In the past two years we also took WEEK LONG trips to Switzerland, The Netherlands and Hungary. Trips where we took HUNDREDS of pictures.  And have NO frame-able pictures of us in front of something special. New goal: take at least one good picture of us on EVERY trip. 

Crafts Above the Couch


And what ever became of this?


I hung it above the table. 
Not sure how I feel about it.  But I'm less annoyed than I was when it was sitting in the floor. 

And now I have a place to hang greeting cards. Yeah!

Do you think this counts as wood working?


Saturday, February 25, 2012

Week 9: Spring Necklace


One of my lovely girlfriends, who reminds me of all things coral, spring, and sunshine, is having a birthday soon.  I figured she could use something bright and fun to remind her of what she is to me. 
 
  The beads I chose for her necklace are sunny beach colours that remind me of her.  Secondly, because she's a preschool teacher I chose bead shapes that would enchant her children.  I know from experience that her young children will be fascinated by the "treasure," or "candy," around her neck.  Thirdly, I hunted down beads with relatively large holes because I love organza ribbons in necklaces, and because I struggled my way through small holed beads on a necklace I made last year. Not going through that again.
 Materials: Scissors, 3 meters of 1 cm wide organza ribbon. mixture of beads (I used 40).  I also bought 3 meters of fishing-line just in-case the ribbon wouldn't fit (I didn't end up using it).
Not pictured: half meter of 2 cm wide organza ribbon, and a yarn needle. 
 I laid all the beads out in three rows of different lengths.  I'm too neurotic to make a non-symmetrical necklace, so I made sure to have one extra bead as the center of each row.  The tangerine coloured beads are slightly pointed at one end, so I also made sure they were all pointing towards center (or away) as to not mess with the symmetry.
 LOVE those beads that look like marbles.
 Between each bead I tied a knot in the ribbon, to keep the beads in place.
 When I finished a row, I tied a knot, and then a second knot a few inches down. Then I started the next row. 
 So all three rows were attached in one long string. 
 Then I zig-zagged the rows back and forth with the spaces between the rows all pressed together. 
 Here's where I made the mistake of thinking I didn't need to try anything on before finishing (like every other project I've ever made).  When I tied all the ends together it turned out that I had one short strand, and two long strands, with nothing in the middle.  Sigh.  Time to tear apart the last strand of the necklace and remove some beads to shorten it.  

Note: If you, unlike me, like to measure twice and cut once (you planners, you) maybe buy more ribbon than you need, and string each strand separately. Start with the center beads, and leave three inches of ribbon on each end so that you can adjust the lengths there instead of having to untie all of your knots.  Grr. 
 Anyway... once your strands are all the perfect length, tie a tight knot around the ends on one side with your thicker ribbon.  Stand in front of a mirror to decide how long the necklace should be.  Unless you're adding some sort of clasp, don't forget that it needs to be long enough to pull over your head.  Tie another tight knot around the other three ends.  

Cut the ends off leaving about half an inch. 

Ta-Daaa!  

Happy Birthday Nikki!  Your gift is coming just a little late. 

Sunday, February 19, 2012

Week 8: Beanies for Craft Hope

Sending some love.

This week I got back in the Craft Hope groove.  If you haven't spent anytime getting to know this wonderful organization, now's the time.  Every few month they pick a new charity, and a new craft to support people who need some extra love.
Each of their projects helps a group in need, and includes tutorials on possible ways to make the craft.  It is so inspiring to see how many people get involved to send a little handmade love to someone across the globe.  I just love these ladies.

This month's project supports The Littlest Warriors, children fighting cancer. The donation is handmade beanies for their cold little heads, and/or handmade totes to bring their toys and books to and from chemo in.

Unfortunately my sewing machine didn't make the cut when I was narrowing down what could come with me to Turkey, so all of my projects are yarn based these days.  So totes were out. But I love beanies! If you're interested in getting involved too, you still have almost a month before the deadline, and using the pattern I included below, it only takes me a few hours to make a super cute beanie. 

The owl beanie is the same pattern I used to make Baby Ellis's beanie in week 2.  The pattern can be found here, at Daisy Cottage Designs.

Alan actually made this fabulous camel beanie.  I'm hoping to get him to release the pattern, which he designed himself, here someday.
He even added a crescent moon and star, like the Turkish flag.  :)

The cupcake beanie will be the next pattern I write (next week maybe?).

So Sweet.
And finally, the penguin and bunny were both made using my top down beanie pattern as a base.  You can download the Excel Spreadsheet to help you figure out how many stitches to use for whoever you're making your beanies for. 

 This pattern is really only for a base beanie with ear-flaps.  All the extra facial features and such are added once the beanie is finished.  I'm also working on patterns for these individual features.  Coming soon. 


If you want to see step by step instructions for the bunny beanie, and the top down beanie pattern, click here:  Bunny Beanie Pattern.  

And think about making an extra one for some one fighting a terrible fight with cancer. 

Hop Hop! Bunny Beanie!


Download my Top Down Beanie Excel Spreadsheet to figure out how many stitched you should be using to make your beanie the right size. This post contains pictures and commentary, but the spreadsheet contains the actual pattern for the beanie.  Use both.

Materials: Yarn (I've used all weights), Crochet Hook (I use my trusty 5.00mm), Scissors, Yarn needle. 

Refer to beanie measurement chart.  Or measure your own head.

Average Head Sizes (in inches):
New born: 14"-15" around, 6"-7" tall
Baby: 15"-18" around, 7"-8" tall
Toddler: 19"-22" around, 8" tall
Kid: 21"-22" around, 8"-9" tall
Teen: 20"-22" inches around, 9"-10" tall
Adult woman: 21"-23" around, 11" tall
Adult man: 23"-24" around, 11"-12" tall


Use this online actual size ruler  if like me, you're too lazy comfortable to get off the couch and find a real-life ruler.
Stretch the yarn slightly while you measure, so the beanie fits snugly.
I wanted to make a toddler beanie, so I chained to 20 inches.

Then I counted the chains:  52.  The pattern I wrote works in multiples of 7, so I rounded up to 56, and plugged 56 into the space next to "Cir. of Head."

I pulled out the chain, and started work on my magic circle.
If you don't know about the magic circle, learn about it here.
Tighten circle, and Sl st to close.
During each of the next 6 increasing rows, I use Sl sts to end each row, and a climbing chain (2) as each first HDC.  I didn't specify this in the pattern, as it isn't necessary, it simply helps me to keep track of where I am in my rows.
Can you see the first stitch in the round?  I can! 

Climbing Chain!
Once I reach row 7, and am no longer increasing, I stop Sl stitching to the end of the row.  Instead, I just HDC in each stitch all the way around.  Ending a row with a Sl st and a climbing chain leaves little visible holes.  HDCing all the way around looks more continuous.
Row 7 finished!  No more counting! YESSS!
Again, I use the online ruler measure the height of my beanie.  Once I reach 8 inches I fasten off.  
LOVE not having to get off the couch to find a ruler. 

Now for the ear flaps...

Again... refer to the Excel Spread sheet to know how many stitches wide your ear flaps should be.  I couldn't figure out how to make the program round to the nearest whole number, so you'll have to do that on your own. (Does anyone know if there's a function for that?)

The space between the ear flaps in the front should be wider than the space in the back.  You don't want those ear flaps in your face.  

Back<---------   ---------->Front
When you're done making the ear flaps, single stitch all the way around to even out the bumpy edges.  I used white just for fun, but also so you could see it better. 
See those rough edges?

The vertical edges around the ear flaps are somewhat tricky to stitch into, simply because they go from side-of-climbing-chain, to side-of-HDC. Simply try to keep them evenly spaced.  
Aim for one stitch in the climbing chain, and one in the HDC.  Repeat.

Also, while you're going around the corners, add an extra stitch in the corner stitches on the bottom edges of the ear flaps. 

An extra stitch in the corners will help keep the corners flat.
But on the upper corners where the ear flap meets the beanie chain two spaces together. 
Decreasing around these corners will keep the corners from flaring.

You have just completed the basic beanie that I use for most of my animal beanies!  Stay tuned if you want to turn it into a bunny...

 
Inner Ear (make 2)

Chain 7.  HDC in 2nd chain from the hook.  HDC to the end of the row. 
Row 2-5: Chain 2.  HDC across.
Row 6:  Chain 2.  HDC in first stitch. HCD 2tog. HDC to the end of the row.
Row 7: Chain 2. HDC across.
Row 8: Chain 2.  HDC in first stitch. HCD 2tog. HDC to the end of the row.
Row 9: Chain 2.  HDC across.  
Row 10: Chain 2.  HDC in first stitch. HCD 2tog. HDC to the end of the row.
Row 11:  Chain 2.  HDC 2tog. 
Slip stitch all the way around.  

Outer Ear (make 2):

Chain 10. HDC in 2nd chain from the hook. HDC to the end of the row.
Row 2-5: Chain 2.  HDC across.
Row 6: Chain 2.  HDC in first stitch. HCD 2tog. HDC to the end of the row.
Row 7: Chain 2. HDC across.
Row 8: Chain 2.  HDC in first stitch. HCD 2tog. HDC to the end of the row.
Row 9: Chain 2.  HDC across.  
Row 10: Chain 2.  HDC in first stitch. HCD 2tog. HDC to the end of the row.
Row 11: Chain 2.  HDC across.
Row 12: Chain 2.  HDC in first stitch. HCD 2tog. HDC to the end of the row.
Row 13: Chain 2. HDC across.
Row 14: Chain 2. HCD 2tog. HDC 2tog.
Row 15: Chain 2.  HDC 2tog.  
Single Stitch all the way around. Leave a 18" of a tail, for sewing.


Clip inner ear to outer ear.

 
Sew on using long tail of outer yarn.


 Pinch the bottom of the ear closed and sew onto beanie just outside the first round.  I sewed mine on a little towards the front, and pointing out a little.

Nose (make one):

Chain 7.  Single stitch into 2nd chain from hook.  Single stitch across.
Chain 1.  Single Stitch 2tog.  Single stitch into next stitch.  Single stitch 2tog.
Chain 1. Single stitch 2 tog twice.
Chain 1. Single Stitch two together.
Single stitch all around to edge.
Leave 6" of tail for sewing on.  


Outer Eye (make 2)

 Start with a magic circle. 
 HDC into circle 8 times.
HDC 2 in each stitch all around. 
*HDC 2 in first stitch, and one in 2nd* all the way around.
Sl stitch to fasten.  
Leave 12" of tail for sewing on. 

 Inner Eye (make 2)

Start with a magic circle.  
HDC into circle 10 times.
Sl st to fasten.  
Leave 6" of tail to sew on.


 Clip eyes and nose in place and sew on using yarn needle and tails. 


 That's one cute bunny!

Feel free to use this pattern for your own crafting joys.  Let me know if you have any problems or questions.  If you post pictures of your bunny beanies on your blog, please refer your readers back to me.

Hoppy crafting! (sorry)